I picked this desk up from a friend of mine that told me if I didn’t want it she was going to haul it out to her burn pile! 😲 I couldn’t bear the thought! As you can see it did need some work!

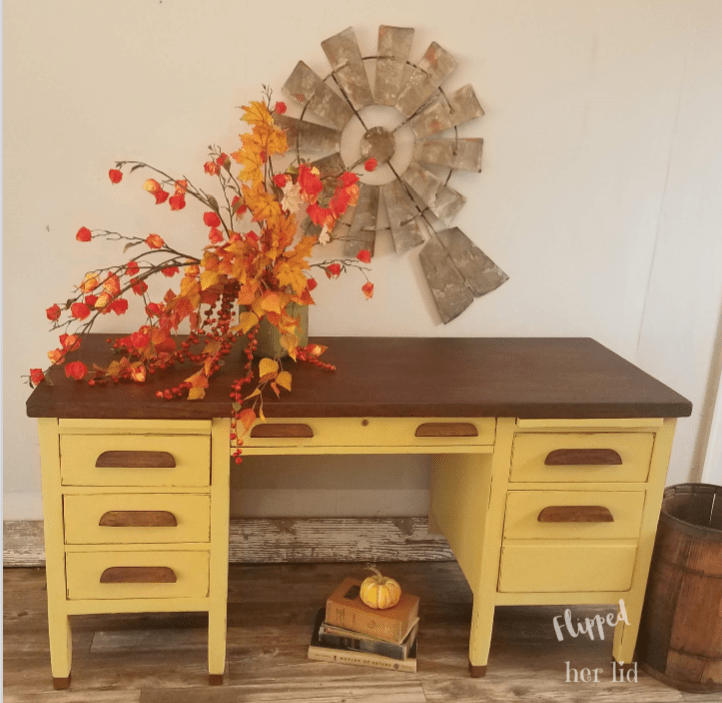
I have a love-hate obsession for this type of project. In the beginning, I see a diamond in the rough. I start making a mental note of all the things that I can quickly fix and imagine how gorgeous it will be when I’m finished. Then, like most remodeling projects I’ve ever started, the quick fixes reveal more problems and before I know it I’ve spent more time patching and repairing than I’ll ever get out of it! There is usually a turning point during these projects where I feel like hauling the piece to the burn pile myself! I eventually accept the fact that all I’m going to get out of it is the satisfaction of knowing that I rescued an old beauty and gave it a second chance. So this is Paula after her makeover, what do you think?
Paula’s old desk had some unique issues. At some point in time, someone had replaced the back of the desk with a piece of plywood. You can see in the “before” photo that a rough square was cut out of the center, maybe to access an outlet or something. The desktop was only held on with two screws, the hardware for the other six was there but the screws had all stripped loose and the holes would need to be puttied and re-drilled. One drawer handle was missing along with one of the slide-out writing boards, and some veneer was chipped away on one side. Due to the original back being removed, several of the drawers had no stops so they pushed in too far. They also had loose joints that needed to be glued.
I had my brother Tim help me with some of the repairs. We trimmed the plywood back so it would not be visible from the front. We cut and installed a new board for additional support behind the center drawer. Drawer stops were installed behind all of the drawers. Tim also cut another slide-out board to replace the missing one. We patched the broken veneer and glued all the loose drawer joints.

The drawer with the missing pull is actually one deep drawer so I didn’t bother trying to replace the pull since it wasn’t really necessary. I puttied the holes and painted over it. Finally, the desktop was reattached.

Since this desk came from an old farmhouse and had quite a bit of visible wear, I wanted to keep that distressed, country look. I sanded the dark varnish off of the desktop. There were some chips and burn marks on the front edge that I couldn’t sand out for fear of sanding through the veneer but I figured it gave it some character and would blend in with the stain for the most part anyway. I gave it two coats of Minwax dark walnut stain. When the stain was dry I applied a clear matte finish sealer.
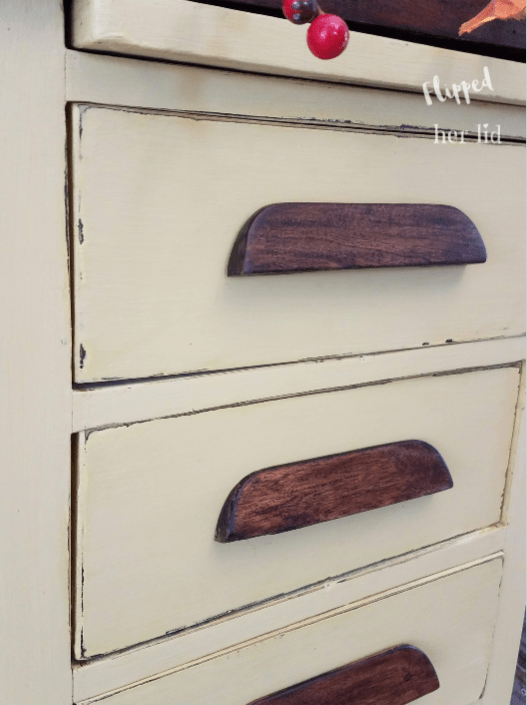
I painted the rest of the desk with 3 coats of Rustoleum Chalked in English Mustard, blended with a dollop of some dark brown chalk paint I had on hand, just to darken it up a bit. I lightly distressed around the edges before sealing the desk with clear matte. I sanded the old varnish off of the drawer pulls and applied the same walnut stain I used on the desktop. I took these photos in my garage and the lighting is not the best so in this shot, the desk color appears to be a pale yellow but it is definitely more of a mustard yellow.
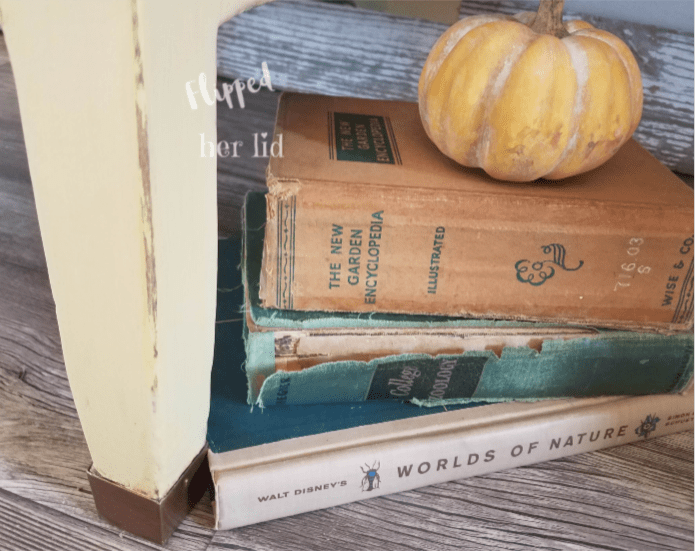
I painted the metal caps on the front legs of the desk with Rustoleum Accents Bronze Medal. I found out when staging for photos, shopping Mama’s house is better than any flea market! Not only does she have rooms full of antiques and collectibles but I don’t have to pay to use them! This stack of old books belonged to Dad. I thought the colors would work well with the Fall look I was going for here.

The insides of the drawers looked pretty rough even after a good cleaning. A couple coats of Home Decor Java, sealed with clear matte makes them look fresh and clean! Sometimes when you paint old, dry, unfinished wood like these drawers, the wood soaks up the paint and swelling occurs. When it came time to put the drawers back into the desk they didn’t want to slide in. Just when you think you’re in the home stretch of a project… 🙄

After some sanding, repainting, sealing, and then waxing the drawer slides, we were back in business! Check out the secret compartment in the back of this drawer! A great place to hide your mad-money. 😉

I couldn’t seem to find the right container for my Fall florals but I had this cracker jar on hand and I thought with a little paint it might just work. I used a grey primer on it first and then two coats of a custom mix of some chalk paint I had on hand. After that dried I used a dark brown antiquing wax, lightly dry-brushing it on and wiping the excess off with a rag. I wrapped the rim with some jute twine. How cute is that?

Finally, it all came together, just as I’d pictured in my mind when I first saw the desk!
Thanks for stopping by! Here is a preview up an upcoming project, if you have any ideas be sure to leave me a comment!


Good job!! The remodeled desk is absolutely gorgeous!!
LikeLike
Thank you!
LikeLike