Lisa is another one of the pieces of furniture I picked up from some friends who were flipping a house and wanted it out of their way. In other words, free! 😍😍😍. The top section of the hutch is removable which made it much easier to transport and work on.

As you can see, Lisa was a hot mess when I got her! Let’s just say there was a lot of cleaning to do here!
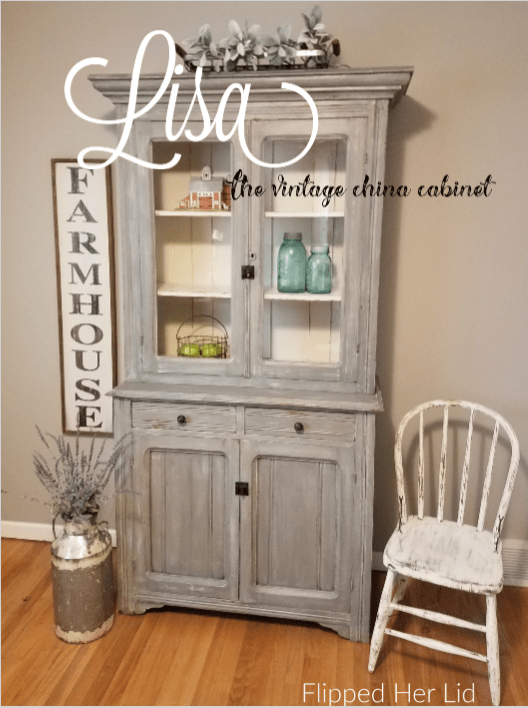
I wondered if this might be a handmade cabinet, just based on some of the rough cuts of wood and the unique system used for the adjustable shelves shown in the image below. The shelf boards rest on a crossbar on each side which can be moved up or down within the notches to adjust the shelf height. I’ve never seen anything like it!

There was no top on the cabinet and it doesn’t appear there ever was one. It seemed kind of unfinished without a top but maybe it was built to fit right up under another cupboard or something. I love to display things on top of my own hutch so I really wanted to put a top on Lisa. We happened to have a reclaimed top from another piece of furniture that was almost the perfect size. We just had to trim a few inches off of one side and it was good to go!


Products used:
- Kilz Stain Blocking Primer
- Rustoleum Chalked Country Grey
- Valspar – ClayAngel satin finish
- Rustoleum Chalked Smoked Glaze
- Rustoleum Matte finish sealer
- Vintage cabinet latches: https://www.vandykes.com/
After a good cleaning, I did some minor repairs and patching. I applied a coat of primer over the entire cabinet to avoid tannin bleed-through from the original dark stain. I painted the inside of the cabinet, drawers, and the shelves with latex paint in a satin finish and lightly distressed. I used chalk paint on the outside of the cabinet and then dry brushed with the same paint I used on the interior. I distressed on the edges and then applied the smoked glaze. I finished the exterior with Matte sealer.
Since this cabinet was missing the door latches, I ordered some online from Vandykes. The knobs I used on the drawers were reclaimed from another project. Even though I painted the insides of the drawers I was feeling a little extra and went ahead and put some cute, rustic looking paper in the bottom too! It’s just taped down with double-sided tape and can easily be removed without harming the paint.


Thanks for stopping by! Let me know what you think of Lisa and don’t forget to pin me on Pinterest! You can also follow Flipped Her Lid on Facebook and Instagram 😊

Oh my that is so darn cute!!!
LikeLiked by 1 person
I think that it is really cool & beautiful Laurie You did a great job refinishing .
LikeLiked by 1 person
Thanks Dale!
LikeLike
Hi Laurie. Love the do-over on the cabinet, it is totally my style. I actually have started my china cabinet from the 40’s I believe. I am painting it a very pretty shade of blue and am going to paint the backboard off white with pencil lines to imitate shiplap. I am curious if your backboard is original or if it is paper like the drawers? Thank you.
LikeLike
Hi Sue, thank you for the compliment! Yes, the backboard on my cabinet was the original wood. Love your idea for shiplap, I used that pencil line technique on a partial wall in my house and it turned out really cute. Good luck with your project!
LikeLike