I love the challenge of a new and different project so when my son’s fiance asked me if I could make her some “first look” doors for her outdoor wedding ceremony I jumped at the chance! I’m mostly just a painter, my brother, Tim, is the builder and I don’t think he gets nearly as excited about these things as I do! 😉 So with his help, this adventure began!
We searched the internet for instructions for this type of project and couldn’t find any so I decided to log the steps we took to build this frame in case anybody else out there is looking to build their own free-standing door frame. We used a picture we found on the internet as an example of how we wanted our frame to look. We also wanted to make this frame easy to disassemble because we would have to be able to haul it to the wedding venue in the bed of a pickup truck and reassemble it on site.
Step 1. The base frame was laid out first which consists of two six-foot 4x4s and an eight-foot 2×4. A notch was cut into each 4×4 to allow it to lay over the top of the 2×4 so that all three boards laid flat on the ground in an H shape. 3″ screws drilled in from the bottom hold the base frame together. As you can see in the images below the 2×4 provides more stability for the base and serves as a threshold for the doors.

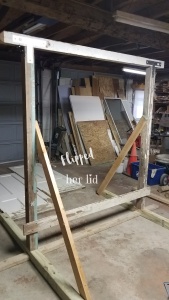
Step 2. Once the base was complete, the doors were laid out on the ground, measuring for the width and height of the frame. Our doors measured 78″. The 4×4 side posts were laid out next to the doors and a 4×4 top piece laid out above the doors. It was easy to mark where the door hinges would need to be placed on the side posts while it was lying on the ground. The side posts were cut to 76 1/2″, an inch and a half shorter than the doors to account for the thickness of the base and leave enough clearance for the doors to swing open easily over the 2×4 threshold. A small 1/4″ gap was left between the doors to keep them from possibly sticking together when closed. We wanted to be sure that when the moment came for the doors to open and the bride to walk through there wouldn’t be any hangups! The 4×4 top piece was cut to 7’4″ to accommodate the width of the two doors while extending out past the side posts. Large T braces were used to attach the top to the side posts. In the image above you can see a board tacked across the bottom of the door frame which is temporary to keep the 4 x 4s from moving when the frame is lifted in place over the base. The doors were not attached to the frame yet.
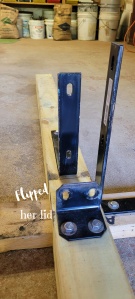
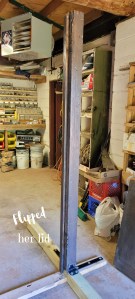
Step 3. Once the frame was lifted into place on top of the base a level was used to ensure the frame stood square and straight. Then temporary 2x4s were attached to the base and the frame to hold it in place (shown in the second image above) while all the steel corner braces were installed. 12″ braces were used on the sides to attach the side posts to the 2×4. 8″ braces were used to attach the side posts to the 4×4 base on the backside. 2″ braces were used on the front side. See images below of braces installed on the base and then the side post installed on the base. 3/8 x 3″ lag bolts were used to attach the braces. Once the frame was installed on the base, the temporary 2x4s were removed.
Step 4. Next, the marked areas where the door hinges would be placed on the frame were chiseled out. Some of the original hinges were usable on our vintage doors and the ones that weren’t were replaced with old hinges we had on hand.
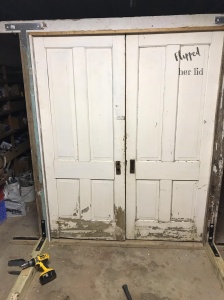
Once the doors were hung in the frame some 1x2s were cut and installed on the top piece and sides of the frame as a doorstop. This is visible in the second image above, attached to the 4×4 side piece. Below are the finished doors.
Lumber and hardware needed:
- 2 six foot 4 x 4s for the base
- 1 eight foot 2×4 for the base
- 3 eight foot 4x4s cut to fit your doors
- 3 eight foot 1x2s cut to fit your doors
- 2 vintage doors
- 2 T braces
- 2 twelve-inch corner braces (to attach side piece to 2×4)
- 2 eight-inch corner braces (to attach side piece to 4×4 on backside)
- 2 two-inch corner braces (to attach side piece to 4×4 on front side)
- 3″ deck screws
- multiple 3/8 x 3″ lag bolts to attach braces to frame and base
- you may need door hinges/knobs depending on the doors you use
That is pretty much it. It was easy to disassemble and load into a pickup truck to be hauled to the venue. It reassembled easily. We brought some wood shims with us to the venue in case the ground was not level where we placed the doors but we did not end up needing any.
Once the doors were built I went on to paint them but depending on the condition of the vintage doors you have you may be able to skip that step! The post for how I painted the doors is listed on this website if you’re interested in achieving the same look for your doors.
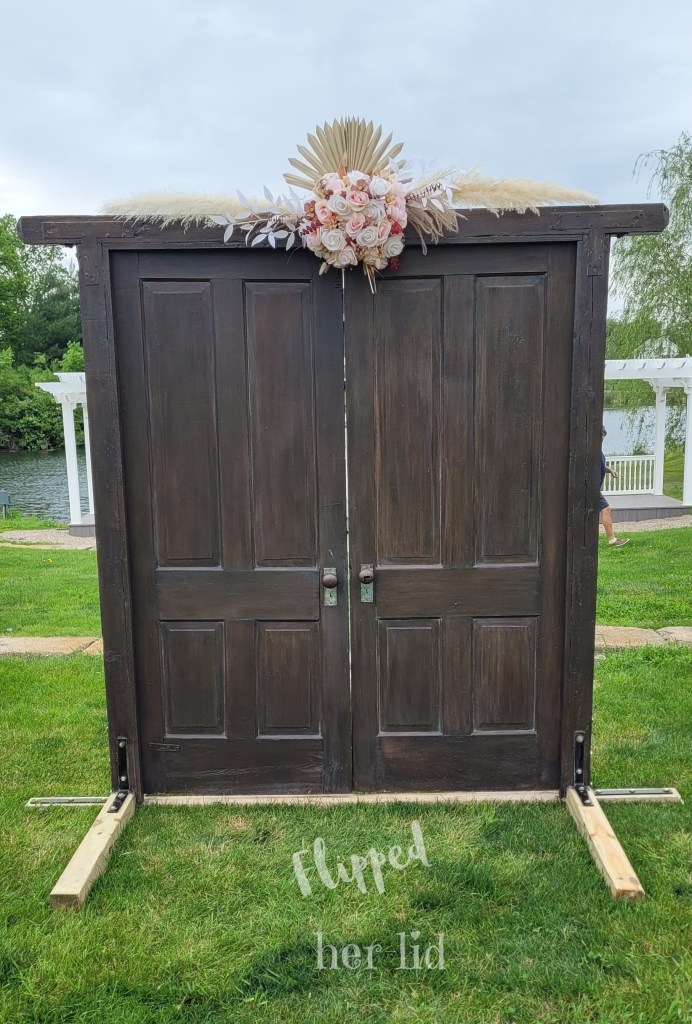
The image below is the finished doors after painting. If you have any questions feel free to leave a comment or email me at flippedherlid@gmail.com.


Hi! Thank you so much for sharing. I get married in 2022 and hope to have something similar. When you disassembled it for transportation what all came apart to put back together? Was the frame in multiple pieces?
LikeLike
Hi Kelli, congrats on your engagement! Yes, the base of the frame that laid on the ground was shaped like an H. Two 4 x 4s with a notched 2x 4 across them as a threshhold. The door frame that stood on top of that base was made of 4x4s, two for the sides and one across the top. We attached the door hinges to the frame and when we disassemble it, we just took the hinge pins out and removed the doors. Then if you look at all the 4x4s they are held together with metal braces which were easy to unscrew. We marked all of them so when we set it up again we would know exactly where each piece should go. We put the screws in ziploc bags. The wedding venue was outdoors with no electricity nearby so we took a cordless drill to reassemble everything. We laid the H out on level ground, attached the side pieces with the metal brackets, attached the top piece, and then put the doors back on. We had added some trim pieces to the backside of the door frame on the top and sides to keep the doors from swinging past the threshhold. during the ceremony they were propped open with stakes in the ground to allow everyone to pass through and then when it was time for the bride to come through they were pulled closed so she could come up behind them without being seen and then when her song started the doors were pulled open for her big moment! It was pretty cool! My brother is pretty handy with carpentry work so he is the one that built the frame. If you know someone handy to build it for you go for it! It was a fun project and I was able to sell them after the wedding a get some money out of it so that was nice too! Good luck!
LikeLike
Thank you so much! This definitely helps! ❤
LikeLike
Thank you for this detailed diy! It is so helpful in visioning how to put together the frame. I’m wondering if you think the 2×4 across the threshold could be eliminated and just have bracing outside of the frame on the ground. I’m afraid the 2×4 across threshold might be a tripping hazard for out grandmas. It is necessary for stability? Thanks again.
LikeLike
Hi Twila, we thought it would make the frame more stable but I do think you could leave it out and like you said, use bracing on the outside. We worried about tripping as well but there was two ushers standing at the doors as people walked through to alert them and luckily we didn’t have any issues. After the wedding I listed the doors for sale on a facebook wedding swap page and made a nice little profit! Good luck with your project!
LikeLike
Thanks again! Looking forward to the build and to the wedding! Nice to know about resale option!
LikeLike