Andi is the sister of one of my son’s childhood friends. She’s all grown up now with a family of her own but whenever I see her I still remember that bubbly little girl that loved feeding my horse apples anytime they stopped by! When she asked me to paint this dresser set for her newly remodeled master suite, I was happy to help! Below is the before and after pics.

Andi bought these Drexel dressers from Marketplace for a great price. They are in fantastic condition, clean, and barely used. She liked the Farmhouse style of one of my previous projects where the top had a wood-stained look and the bottom was painted and distressed. She was also hoping I could cut away the outdated skirting around the bottom for a more modern look.
If this was one of my own projects I wouldn’t have been quite as nervous to remove the skirting around the bottom but I was pretty worried about ruining Andi’s furniture. Fortunately, the skirting is just attached with screws, and once removed, the dresser sits flat on the ground but is about 5″ shorter so new legs were definitely necessary.
I opted to make the new legs from a 4 x 4 cut into 5″ lengths rather than buying premade legs. I installed the 4×4 legs with hanger bolts and plates made to attach to the bottom of the dresser.
Both of these dressers are huge! The short one is six feet long! I had no choice but to work on them in the garage because they were too big to fit down the basement stairs which is where I usually work on my projects. The garage poses a whole list of obstacles to work around including poor lighting, dust, excessive heat/cold, humidity, lack of space, etc., but I made it work! I labeled all the drawers so I would know exactly which dresser they went to and where they belong before removing them for painting.
The first step was removing all of the old hardware and filling in all the holes with wood filler. There was a ton of them! 😵
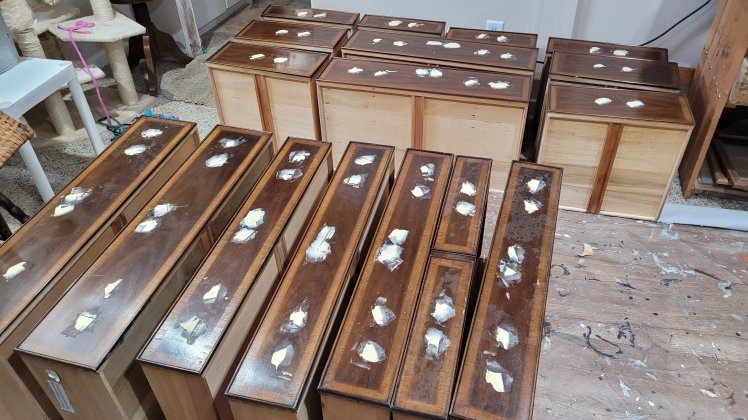
After choosing new hardware came the daunting task of marking and drilling new holes. Since most drawers were different sizes, using a template was not an option.
I cleaned the dressers with a TSP substitute and then wiped them with a damp cloth to remove any residue and allowed them to dry thoroughly. The surface of the dressers was fairly glossy so before I applied any paint I used a deglosser to prep the surface for the primer. I used two coats of adhesion primer just to make sure my paint would stay put.
I could give you the shortened version of painting these two beasts but what would be the fun in that? Instead, you get the long, painful version of mishaps, mistakes, and disappointments I had along the way!
I first chose a pale, icy grey color for the drawers and the base of the dressers. It took three coats for good coverage, ugh! Next, I painted the top with a process I’ve used many times before on different projects. It requires several coats of paint, the last applied with a blending technique with a couple of contrasting colors to mimic the look of raw wood followed by antiquing wax to blend it all together.
It was late one night when I finished that process and the next morning when I looked at it with fresh eyes I could see that the top had a warm honey tone to it and the base was a very cool, pale, grey… not a good combination! I didn’t particularly like the icy grey color but the thought of repainting all those drawers and the two large bases was too daunting so I decided changing the tops to more of a driftwood look might work well with the cool icy grey and would be a lot less work.
Unfortunately, I still didn’t like what I was seeing. Plan B involved applying a smokey glaze to the base and drawers, thinking it would soften the icy grey while accentuating the details on the drawers. I don’t work with glaze very often and every time I do, I swear I’m never going to again! Needless to say, it looked awful! The dressers just looked dirty, like they needed to be painted!
I finally had to accept the fact that I was going to repaint the drawers and base. I bought a new can of paint in a warm, light grey color called Stucco. It worked really well with the wood tone on the top and finally, I was happy!
I imagine most people would think of painting the feet of the dresser first so that they wouldn’t have to turn the dresser on its top after they just painted it. Not me!!! I saved the feet for last. I laid out dropcloths on the floor to protect the tops so I could turn the dressers upside down while I painted the feet. When the feet were dry, I turned the dressers back over only to discover I had a big chip in the paint on the top of one of them. I can tell you right now I just about flipped my lid! 🤬 I started having serious doubts about my skills in the furniture flipping world.
Once the top was touched up, I installed the new hardware and did the faux distressing on the bases and drawers. Both dresser tops got clear matte topcoats to protect the finish.
It was a long project with a lot of mishaps but eventually, all the pieces fell into place, the stars aligned, and all was right in my furniture flipping world again! Most importantly, Andi loves how her dressers turned out. In fact, a few of her words were “Holy cow”, “stunning”, and last but not least, “perfect”! (music to my ears 🥰)
The images are a bit shadowy because the lighting in my garage is not the greatest and I had to cover the ugly garage floor with dropcloths so this is as good as it’s gonna get!


Thanks for stopping by my blog today!

Oh wow… those turned out GREAT!!!! What a lot of work you did… she is very lucky! I’m really glad you shared the process—that was educational and at least for me, the moving thru the “that’s not working” stages is very common in my creative endeavors. Having painted a dresser or two myself in the past (though not at your skilled level) I know how much work they are. And you really do them right! What stunning results.
LikeLiked by 1 person