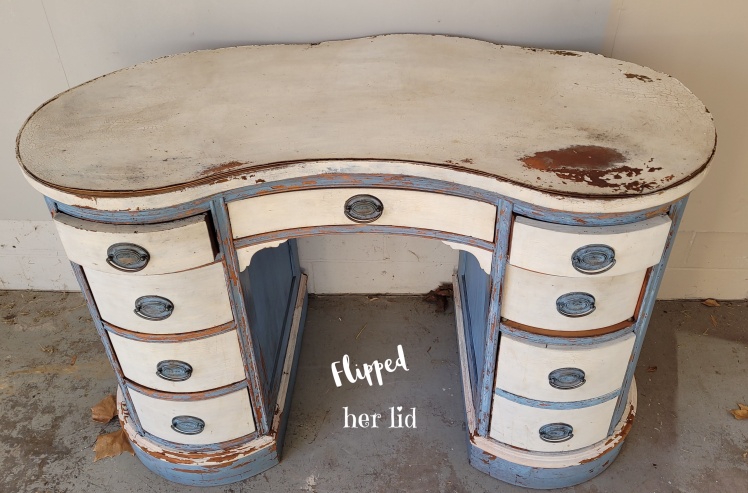

Hi friends! I know it’s been a while since my last furniture project, but I got busy with some home projects and had to take a little break from the furniture. I knew eventually, a piece would come along that needed to be rescued and sure enough, my brother brought me this old kidney-shaped desk that someone had put out for trash pickup. Like me, he can’t stand the thought of a neat old piece of furniture going to the dump! Unlike me, he doesn’t want to spend weeks of his life sanding, patching, and painting so he brings it to me!
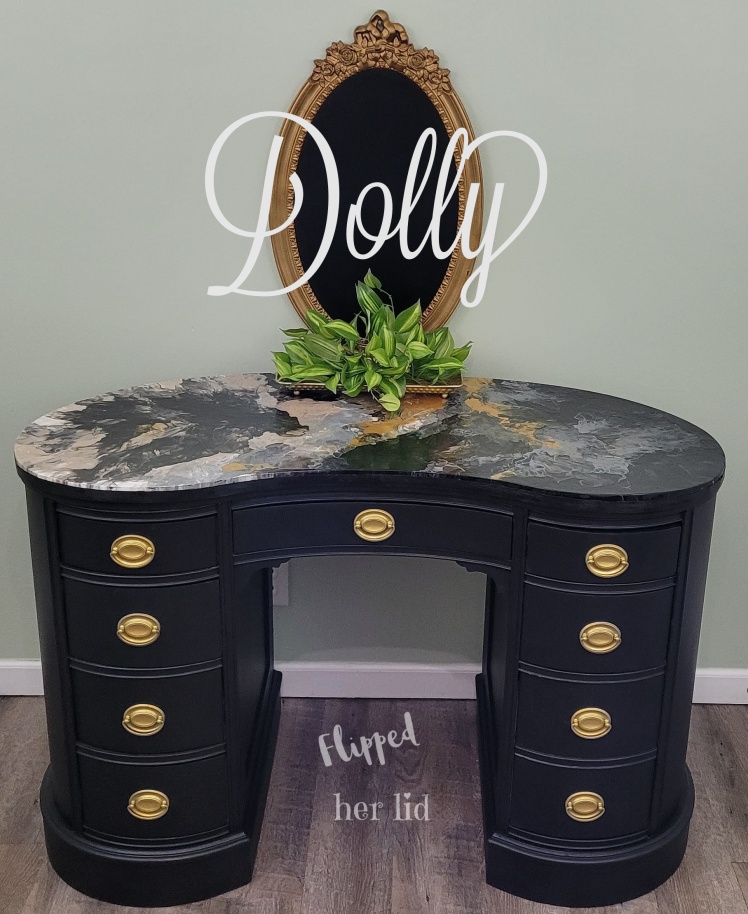
It had been sitting out in the rain so the veneer on top was pretty warped. The insides of the drawers were stained and filthy. The paint was chipping off everywhere. Maybe the previous owner was going for that chippy look but with the varnish underneath chipping off, I knew the whole piece would need to be sanded. I had my work cut out for me but she is a beautiful old desk and I was excited to be starting a furniture project again. I thought maybe I would name her Dolly since she’s so curvy!😉
I removed the warped veneer from the top to reveal a solid piece of wood underneath that would make a good surface for paint. I had to sand every square inch of the desk to get all the old paint and that layer of old varnish off which is why I usually shy away from pieces that have already been painted. It took forever to get the paint out of all those grooves and details. After all of that, I almost considered changing her name to Sandy! But no, she was already Dolly by then and I had such a classy look in mind for her that I thought she should be named after someone famous.
I’ve been wanting to try a paint-pouring technique I’ve seen done mostly on canvas but I have seen it done on some tabletops and it ends up looking like marble. After researching a bit and doing a couple of practice runs on canvas, I felt ready to try paint-pouring on Dolly’s curvy top!
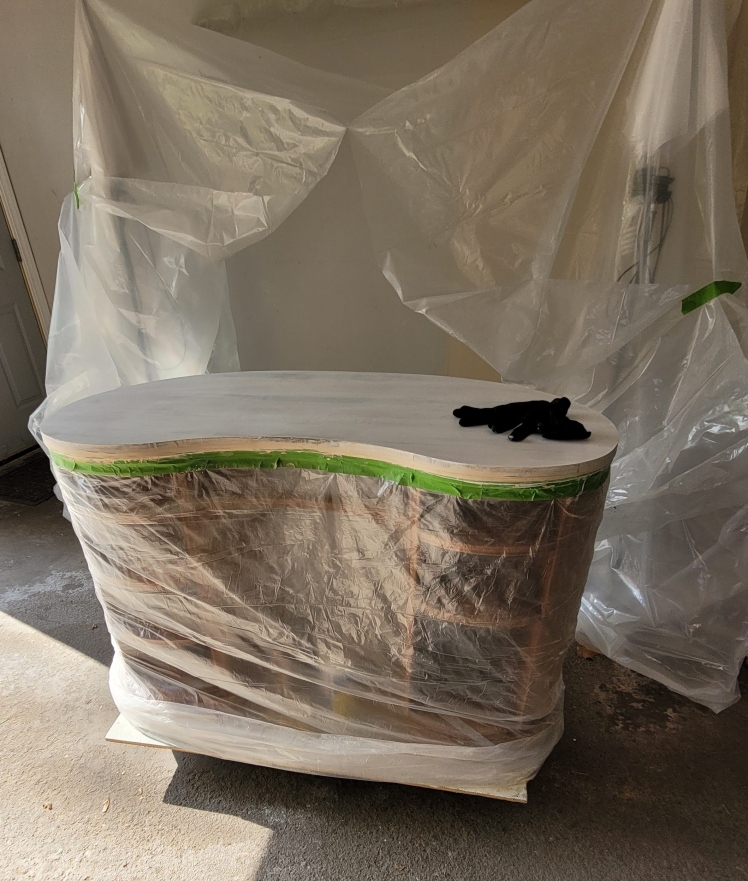
If you’ve ever seen paint pouring you know how messy it is. I did this in my garage in case it was a huge disaster! I used frog tape and plastic to protect the base of the desk from any paint run-off. I left an extra length of plastic around the bottom so that paint could run down onto the plastic instead of my garage floor. (I still got some on the garage floor and ruined a perfectly good top I was wearing).
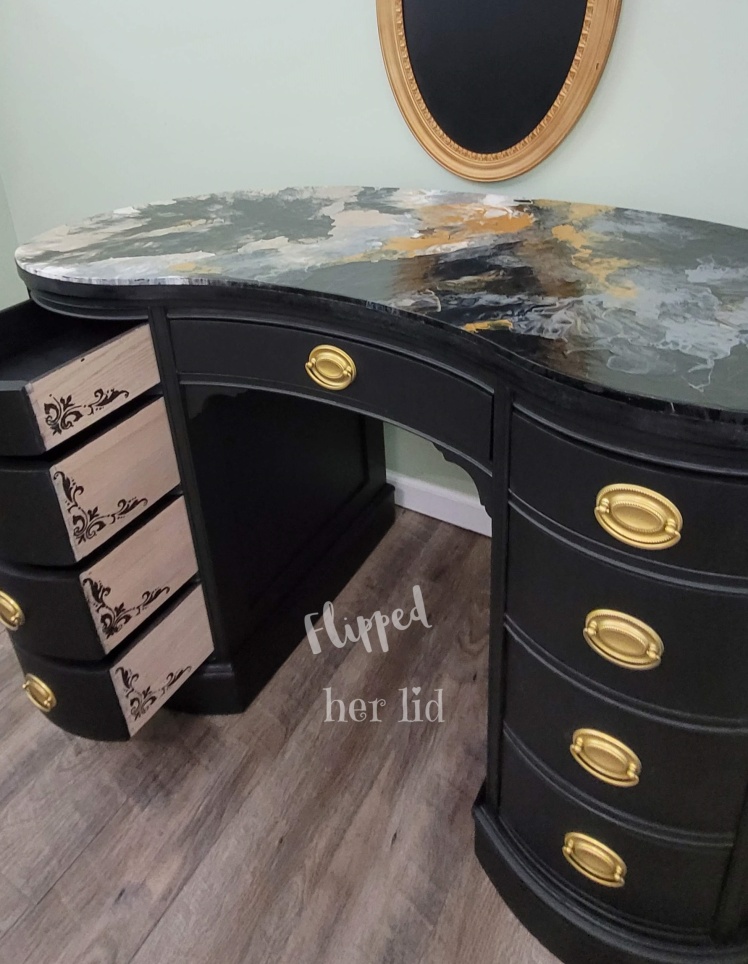
I had already put a base coat of black paint on the top and let it dry completely before doing the pour. I used Master Craft Acrylic paint for the pour in 5 different colors. In separate cups, I mixed each color approximately 50/50 with Floetrol. I poured them onto the desktop in a random pattern and used a hair dryer to give them a flowing, marble-like appearance.
When that messy task was complete I placed the desk in a paint tent to keep dust from settling in the paint and allowed it to dry for about a week.
I painted the rest of the desk in black. I used gold spray paint to update the existing hardware. The drawers got painted inside and out and accented with a black flourish design.


I certainly needed a few cups of ambition while I worked on this project! I hope you enjoyed Dolly’s transformation. She still has some flaws but she’s come a long way from the paint-chipped, soggy desk that initially rolled into my garage that day. I hope to find her a new home soon!
Just as I was finishing with Dolly, my neighbor pulled up with a vintage dresser he curb-shopped down the block and thought I might want it. So stay tuned to see what I do with that one!

Gorgeous upgrade! And what a nice brother to bring you such treasures to restore. I especially love the paint pouring you did on the top, and the stencil on the side of the drawers. That’s a detail that I always appreciate…it brings joy when using it. Nice to see you back with another inspiring piece!
LikeLiked by 1 person